Gemini CLI Subagents. Part 2
What are subagents?
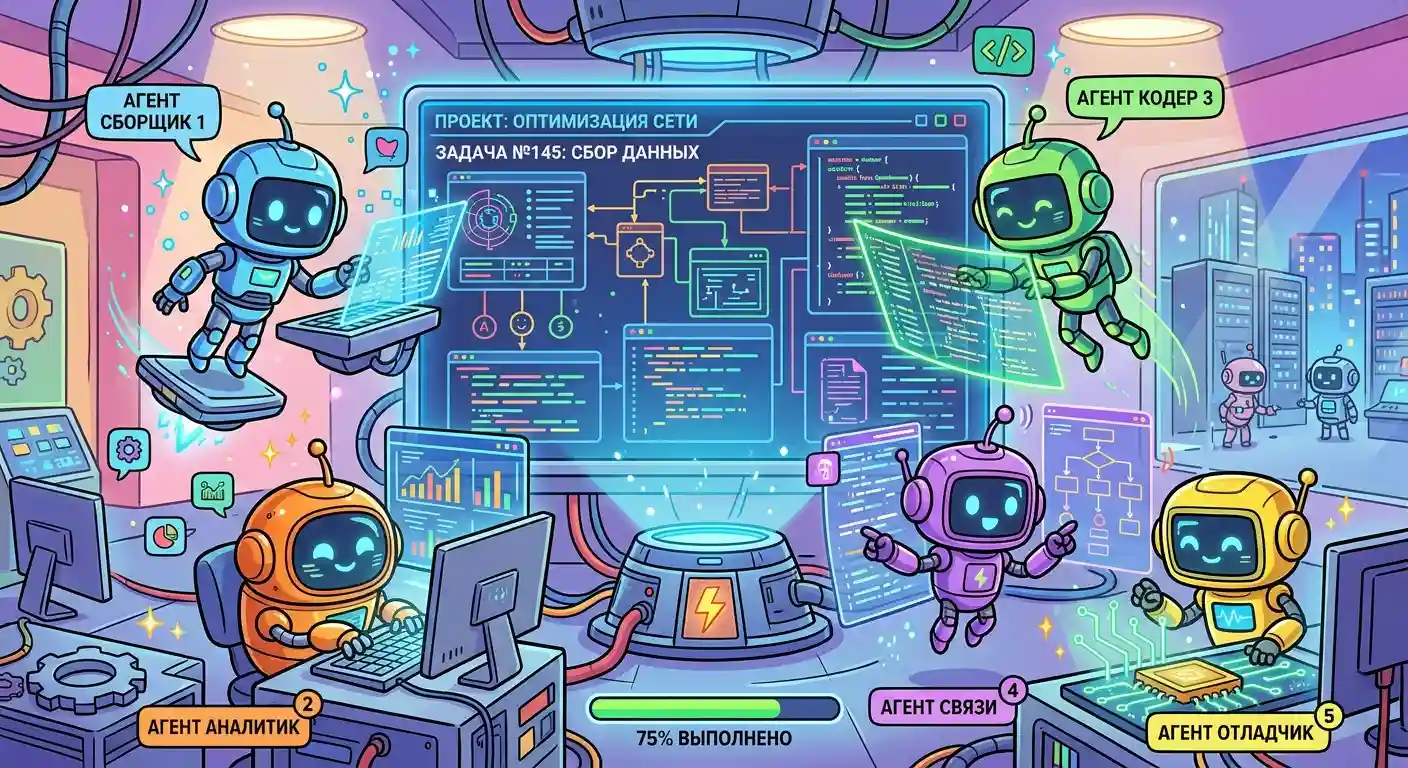
Subagents are specialized expert agents operating in parallel with the main session. The main agent acts as an orchestrator: it delegates complex, high-volume tasks to the appropriate agent, keeping the main context clean and fast.
| Level | Component | Role | Context |
|---|---|---|---|
| Main Agent | Gemini CLI (main session where we invoked gemini in the console) | Orchestrator: makes decisions, delegates, aggregates results | Shared, cumulative |
| Subagent | Specialist (generalist, codebase_navigator, etc.) | Executor: performs an isolated task, returns a summary | Isolated, fresh |
Key Advantages
- Isolated context - each subagent has its own context window, preventing "pollution" of the main session with intermediate steps.
- Specialized tools - each subagent receives only the required set of tools, MCP servers, and system instructions.
- Compact results - hundreds of tool calls within a subagent are returned to the main agent as a single condensed response.
- Parallel execution - multiple subagents or instances of the same agent run concurrently, significantly reducing the overall task completion time.
Built-in Subagents
Gemini CLI comes with four built-in subagents. Three of them are enabled by default. Let's look at them:
| Subagent | Purpose | When to use | Status |
|---|---|---|---|
| generalist | A universal agent that inherits all tools and settings of the main agent. A clone of the main agent in an isolated context. | Multi-file refactorings, commands with large output, action-oriented research | Enabled |
| cli-help | Expert on Gemini CLI itself: commands, configuration, documentation. Has direct access to project documentation. | "How to configure a proxy?", "What does the /rewind command do?" | Enabled |
| codebase-investigator | Specialist in codebase analysis: architectural mapping, finding root causes of bugs, system dependency analysis. | "How does the authorization system work?", "Draw a dependency graph for class X." | Enabled |
| browser-agent | Browser automation via accessibility tree: navigation, form filling, clicks, data extraction. Uses Chrome DevTools MCP. | "Go to example.com and fill out the contact form", "Extract the pricing table from this page" | Disabled |
@agent Syntax and the /agents Command
Gemini CLI automatically routes the task to the most appropriate subagent by analyzing the task description and the descriptions of registered agents; no user intervention is required.
However, by using the @ symbol before a subagent's name, you can explicitly specify the executor in the CLI, adding a system note that immediately activates the required subagent. Let's look at some examples:
@codebase_investigator build the authorization flow- the task is sent tocodebase_investigator, and upon completion, the main agent receives a condensed report.@frontend-specialist review the code and see what improvements can be made- a custom subagent that analyzes the UI and returns only strategic recommendations to the main agent.
Now let's look at the /agents command. We can run this command within a session to view all registered subagents—both built-in and custom. From here, you can also enable, disable, and reconfigure agents on the fly without editing files.
/agents- open an interactive list of all subagents in the session.@<agent_name> <task>- explicitly delegate a task to the specified subagent.agents (disable)- disable a specific subagent in the current session.
Configuration in settings.json
In the settings.json file, you can manage global subagent settings. Key agent parameters:
| Parameter | Type | Default | Description |
|---|---|---|---|
| enableAgents | boolean | true | Global enable/disable toggle for all subagents |
| agents.overrides | object | - | Override configuration for a specific agent (model, max_turns, etc.) |
| modelConfigs.overrides | object | - | Target model settings for subagents (overrideScope) |
| skills.enabled | boolean | true | Enable Agent Skills |
Configuration examples:
// Disable all subagents
{ "enableAgents": false }
// Enable browser_agent
{
	"agents": {
		"overrides": {
			"browser_agent": { "enabled": true }
		}
	}
}
// Override model for codebase_investigator
{
	"agents": {
		"overrides": {
			"codebase_investigator": {
				"model": "gemini-3.1-flash",
				"max_turns": 50
			}
		}
	}
}
Parallel Execution
Gemini CLI supports running multiple subagents or multiple instances of a single subagent simultaneously. This drastically reduces the execution time of complex multi-component tasks.
How to run parallel execution? It is very simple—there are a few ways:
- Explicit request: "Run frontend-specialist for each component in parallel".
- A task description with multiple independent components automatically triggers parallel agent execution.
But pay attention: parallel agents editing the same file may overwrite each other's changes. Use parallelism for tasks with clear and non-overlapping areas of responsibility. Also, note that parallel execution exhausts API request limits faster because requests are sent concurrently.
Creating Custom Subagents
To create subagents, you need to create a markdown file with a YAML header. They can be placed in different locations:
- User level:
~/.gemini/agents/*.md- for all user projects, personal workflow agents. - Project level:
.gemini/agents/*.md- current repository. - Extension level:
/agents/*.md- specific CLI extension.
The file format is very simple, but it must be filled out correctly, otherwise Gemini will not be able to read the subagent information.
--- (example: .gemini/agents/frontend-specialist.md)
name: frontend-specialist
description: Frontend specialist in building high-performance,
accessible, and scalable web applications.
tools:
- read_file
- grep_search
- glob
- list_directory
- web_fetch
- google_web_search
model: inherit # inherits the model from the main agent
temperature: 0.7 # optional, 0.0-2.0
max_turns: 30 # max turns, default is 30
timeout_mins: 10 # max execution time (minutes)
---
You are a Senior Frontend Specialist and UI/UX Architect.
Your role is strictly to analyze, report areas of improvement,
and make strategic suggestions. Do not fix it yourself.
The mandatory fields are name and description.
Tip. To make a subagent available immediately, simply create a
.mdfile in the correct directory. No CLI restart is required—the agent registry updates automatically.
Tips and Limitations
Recommendations:
- Keep the main agent focused on the overall goal and decision-making—do not assign heavy execution work to it.
- Use
@agentsyntax for predictable behavior—do not rely solely on auto-routing. - For tasks with large output volumes (tests, commands), always use
@generalist. - Store team subagents in the repository's
.gemini/agents/—they get committed to git and become available to the entire team. - For light tasks, specify a flash model in YAML to save quota.
- Restrict subagent tools only to those required—this increases reliability and reduces the risk of unintended actions.
- Use
tools: [read_file, grep_search]for analytical agents to prevent them from making modifications. - The
~/.gemini/agents/location allows using personal agents across all projects.
Known Limitations:
- Parallel agents editing the same file can cause conflicts—demarcate areas of responsibility.
- Parallel execution multiplies API quota usage (N agents = N parallel threads).
- Subagents cannot create their own subagents—only the main agent acts as the orchestrator.
- The
browser_agentrequires Chrome 144+ and is experimental—instabilities may occur. - Each subagent has a limit on
max_turns(default 30) andtimeout_mins(default 10 min). - The agent registry is loaded at the start of the session—agent files added during the session may require a restart.
Creating a Browser Game with Gemini CLI + Subagents
After a lot of theory, let's move on to practice. Gemini CLI allows orchestrating a team of specialized AI agents for complex tasks—each subagent operates in an isolated context window and receives only the necessary tools. This is an ideal project for learning because the game requires working with multiple specializations: design, logic, testing, and safety.
What we will build: an isometric 2D farm game on HTML5 Canvas featuring the following systems:
- Planting/watering/harvesting crops (wheat, carrot, corn, tomato).
- Animals (chicken → eggs, cow → milk, sheep → wool).
- Shop: selling crops, buying seeds/animals.
- Weather and time-of-day cycles affecting growth rates.
- Inventory and player money.
Step 1 - Project Structure
Create the directory where our code will be located.
mkdir pixel-farm && cd pixel-farm
Our project structure will look like this:
pixel-farm/
├── GEMINI.md
├── index.html
├── game.js
├── style.css
└── .gemini/
    ├── settings.json
    └── agents/
        ├── world_builder.md
        ├── game_mechanics.md
        ├── ui_designer.md
        ├── economy_designer.md
        └── qa_tester.md
Step 2 - GEMINI.md (Project Context)
Fill in the project context—add a description of our game, the stack we will use, environment constraints, architecture, and the definition of done (what we should achieve in the end). This acts as the system prompt for the entire project.
# Pixel Farm — Browser Farm Game

## Description
Isometric 2D farm on HTML5 Canvas. The player manages a farm:
plants crops, waters them, harvests crops, sells them in the shop,
buys animals, cares for them, and gathers resources.

## Tech Stack
- Pure HTML5 Canvas (no frameworks)
- Vanilla JavaScript ES6+
- CSS3 with custom properties
- requestAnimationFrame game loop

## Environment Constraints
- Only static files (index.html + style.css + game.js)
- NO localStorage / sessionStorage — in-memory state only
- NO alert / confirm / prompt — HTML UI overlays only
- All external fonts via Google Fonts CDN

## Game Architecture

### Game World
- Isometric grid of 12×10 cells
- Tile system: empty land / tilled plot / planted / ripe
- Time system: day/night (1 game day = 60 seconds of real time)
- Weather: sunny (growth ×1) / cloudy (growth ×0.8) / rain (growth ×1.5, watering not needed)

### Crops
- Wheat: growth 2 min, sell price 5 coins, seeds 2 coins
- Carrot: growth 3 min, sell price 10 coins, seeds 3 coins
- Corn: growth 5 min, sell price 20 coins, seeds 7 coins
- Tomato: growth 8 min, sell price 35 coins, seeds 12 coins

### Animals
- Chicken: produces egg every 2 min, purchase price 50 coins
- Cow: produces milk every 5 min, purchase price 150 coins
- Sheep: produces wool every 7 min, purchase price 120 coins

### Inventory and Shop
- Inventory: slots for each resource type + quantity
- Shop: "Sell" and "Buy" tabs

## Visual Style
- Pixel-art style (ImageSmoothingEnabled = false)
- Warm color palette: green (#4a7c59), brown (#8b5e3c), sky (#87ceeb)
- Isometric tiles drawn via Canvas API (diamonds, not rectangles)
- Accent color for UI: #f4a261 (orange)

## Controls
- Left click: select cell / apply active tool
- Right click: remove crop (if not ripe)
- Mouse wheel / pinch: zoom (scale 0.5 - 2.0)
- Right mouse button drag: camera pan
- UI buttons: tool selection, opening shop, inventory

## Definition of Done
- [ ] Can till, plant, water, harvest for all 4 crops
- [ ] Can buy animals, click them to collect resources
- [ ] Shop opens, buying and selling work
- [ ] Inventory updates in real-time
- [ ] Day/night cycle is visible (color change of sky/lighting)
- [ ] Weather changes every 3 minutes, affects growth
- [ ] Starting capital: 200 coins, 5 wheat seeds
And let's add the settings to settings.json—enable the browser_agent (disabled by default) and define the subagent parameters:
{
  "agents": {
    "overrides": {
      "browser_agent": {
        "enabled": true
      },
      "codebase_investigator": {
        "enabled": true
      }
    },
    "browser": {
      "sessionMode": "isolated",
      "headless": false,
      "maxActionsPerTask": 120,
      "confirmSensitiveActions": false
    }
  },
  "model": "gemini-3.1-pro",
  "sandbox": false,
  "autoAccept": false
}
Step 3 - Creating Subagents
Now to the most exciting part. In this step, we will create the subagents responsible for different features. Each subagent is a .md file with a YAML frontmatter. The file body becomes the agent's system prompt.
- World Builder - responsible for rendering the game world, to be invoked for all drawing tasks.
- Game Mechanics - responsible for game logic and mechanics.
- UI Designer - handles interface rendering.
- Economy Designer - responsible for game economy.
- QA Tester - testing specialist who will test the game loop in the browser.
Let's examine the contents of each agent. Note that different agents use different models—some can use the simple flash, while others require pro, and custom temperature and max_turns configurations.
Agent 1 - World Builder - .gemini/agents/world_builder.md
---
name: world_builder
description: >
  Specialist in drawing the game world on HTML5 Canvas. Call this agent
  for all rendering tasks: isometric grid, land tiles, trees,
  farm buildings, crop animations, day/night effect, weather effects (rain,
  clouds). Examples: "draw 12x10 isometric grid", "add rain animation",
  "implement day/night lighting transition via Canvas overlay".
kind: local
tools:
  - read_file
  - write_file
model: gemini-3.1-pro
temperature: 0.3
max_turns: 25
---

You are a lead HTML5 Canvas game graphics developer specializing
in pixel-art style 2D isometric farms.

Your responsibilities:
1. Draw an isometric grid (diamonds, not rectangles) via Canvas 2D API.
2. Implement tile system: empty land / tilled / planted / ripe.
3. Draw crops at different growth stages (4 stages: sprout, young, adult, ripe).
4. Draw animals (chicken, cow, sheep) as pixel-art shapes via ctx.fillRect.
5. Implement day/night effect: a semi-transparent overlay changes color from
   rgba(255,200,50,0) at daytime to rgba(0,0,40,0.6) at night.
6. Rain animation: array of drops with random coordinates falling from top to bottom.
7. Render farm buildings: barn, coop, pen—simple isometric shapes.

Isometric drawing rules:
- Tile center (col, row) → screen coordinates:
  screenX = offsetX + (col - row) * (TILE_W / 2)
  screenY = offsetY + (col + row) * (TILE_H / 2)
- TILE_W = 64, TILE_H = 32 (2:1 ratio for isometric)
- Render sorting by (col + row) for correct overlapping.

Technical rules:
- ctx.imageSmoothingEnabled = false always.
- All colors are retrieved from CSS custom properties via getComputedStyle.
- Do not use external images—only Canvas 2D API (fillRect, arc, bezierCurve).
- Each draw function accepts (ctx, x, y, options) and returns nothing.

Write complete, working code without placeholders or TODOs.
Agent 2 - Game Mechanics - .gemini/agents/game_mechanics.md
---
name: game_mechanics
description: >
  Specialist in game logic and mechanics. Call for: crop growth system,
  animal system and resource production, tools (hoe, watering can, sickle,
  hands), time and weather system, game loop, handling tile clicks,
  player state machine. Examples: "implement crop growth system taking into account watering
  and weather", "add watering can tool - watering slows down drying", "make it so
  that animals produce resources by timer".
kind: local
tools:
  - read_file
  - write_file
  - run_shell_command
model: gemini-3.1-pro
temperature: 0.2
max_turns: 30
---

You are a lead game logic developer specializing in
farm simulation games (Stardew Valley, Harvest Moon style).

Your responsibilities:

### Crop System
- Each cell: { state: 'empty'|'tilled'|'planted'|'watered'|'ready', crop: null|CropType, growthTimer: 0, growthRequired: seconds, watered: boolean }
- Growth only when watered=true OR weather=rain.
- Each tick (1 game second): growthTimer += dt * weatherMultiplier * (watered ? 1 : 0)
- If growthTimer >= growthRequired → state = 'ready'
- Watering resets every game day (not every real tick).

### Animal System
- Each animal: { type, x, y, productTimer: 0, productInterval: seconds, hasProduct: boolean, happiness: 100 }
- productTimer increases each tick.
- If productTimer >= productInterval → hasProduct = true (collect icon appears).
- Click on animal with hasProduct=true → add resource to inventory, reset timer.

### Tools
- 🪓 Hoe: till empty cell → tilled
- 🌱 Seed: plant selected seeds in tilled cell → planted
- 💧 Watering can: water planted/tilled cell → watered = true
- 🌾 Sickle: harvest ready cell → add to inventory, cell → tilled
- 👋 Hands: interact with animals

### Time and Weather
- Game day = 60 real seconds.
- Time of day: hour = (realTime / 60) * 24 → from 0 to 23.
- Working hours: 6:00 - 22:00.
- Weather changes every 3 real-world minutes:
  probabilities: sunny=50%, cloudy=30%, rainy=20%
  weatherMultiplier: sunny=1.0, cloudy=0.8, rainy=1.5

### GameState Object
```javascript
const GameState = {
  money: 200,
  day: 1,
  hour: 8,
  weather: 'sunny',
  tool: 'hoe',
  selectedSeed: 'wheat',
  inventory: { wheat: 0, carrot: 0, corn: 0, tomato: 0, egg: 0, milk: 0, wool: 0 },
  seeds: { wheat: 5, carrot: 0, corn: 0, tomato: 0 },
  grid: [], // 12x10 array of cells
  animals: [],
  camera: { x: 0, y: 0, zoom: 1.0 }
};
Code Rules:
- ES6+, const/let only, arrow functions.
- All state in GameState, no global variables.
- update(dt) and render(ctx) are clearly separated.
- Comments in Russian only.
Write complete working code without placeholders.
Agent 3 - UI Designer - .gemini/agents/ui_designer.md
---
name: ui_designer
description: >
  Specialist in the farm game interface. Call for: toolbar,
  shop window (buy/sell), inventory window, HUD with money/time/weather,
  tile tooltips, resource collection notifications, pause button, tutorial.
  Examples: "create toolbar with 5 icons at the bottom of the screen",
  "make shop modal window with Buy/Sell tabs",
  "add a popup tooltip on hover over a cell with growth information".
kind: local
tools:
  - read_file
  - write_file
model: gemini-3.1-pro
temperature: 0.5
max_turns: 20
---

You are a lead browser game UI/UX designer specializing in
farm simulation interfaces.

Your components:

### 1. HUD (always visible)
- Top-left corner: money 💰, day, time (12-hour format), weather (emoji)
- Top-right corner: shop button 🏪, inventory button 🎒, pause button ⏸
- Bottom panel: 5 tools in hotbar, selected seed

### 2. Shop (modal window)
- Dark backdrop blur overlay
- Two tabs: "Buy Seeds" and "Sell Crops"
- Buy: seed cards with icon, name, price, +1/-1/+10 buttons
- Sell: resource list with inventory count, unit price, "Sell All" button
- Close button ×

### 3. Inventory (modal window)
- Slot grid (3×4): resource icon, name, quantity
- Highlight non-empty slots

### 4. Tile Tooltip
- Appears when hovering over a planted cell
- Shows: crop, growth stage (progress bar), needs watering (yes/no)

### 5. Notifications
- Pop up in the bottom-right corner
- "+5 Wheat harvested!" with an icon and green background
- Animation: slide in from bottom, fade out after 2 seconds

### CSS Rules
Use CSS custom properties:
```css
:root {
  --color-bg: #2d5016;
  --color-surface: rgba(20, 12, 5, 0.88);
  --color-border: rgba(244, 162, 97, 0.35);
  --color-accent: #f4a261;
  --color-text: #fef3e2;
  --color-text-muted: #c9a97a;
  --color-money: #ffd700;
  --color-success: #52b788;
  --font-body: 'Press Start 2P', monospace;
  --font-ui: 'Inter', sans-serif;
}
All modals: backdrop-filter: blur(4px), border-radius: 12px, border: 1px solid var(--color-border).
Buttons: solid background with var(--color-accent), hover: brightness(1.15), active: scale(0.96). No gradient buttons.
Write complete HTML + CSS + JS code. No placeholders.
Agent 4 - Economy Designer - .gemini/agents/economy_designer.md
---
name: economy_designer
description: >
  Specialist in the farm's economic system and balance. Call for:
  price and balance calculation (not too easy / not too hard start),
  achievement and unlock systems, player progression (farm levels),
  events (market price fluctuations), recipe system (combining resources).
  Examples: "calculate balance so that the first animal can be bought
  after 10 minutes of play", "add daily quests with rewards",
  "implement random market events every 5 minutes".
kind: local
tools:
  - read_file
  - write_file
model: gemini-3.1-flash
temperature: 0.4
max_turns: 15
---

You are a lead economic game designer specializing
in farm simulation game balancing.

Your tasks:

### Price Table and Balance
First chicken (50 coins) should be reachable in ~8-10 minutes:
- 5 wheat plots × 5 coins × ~3 harvests in 6 min = ~75 coins.
- Result: in 6-8 min the player should have 50+ coins.

### Progression System (Farm Levels)
- Level 1 (start): 12 plots, 1 animal slot.
- Level 2 (200 coins): +6 plots, +1 animal slot.
- Level 3 (500 coins): +6 plots, +2 animal slots, tomato unlocked.
- Level 4 (1500 coins): barn (x2 inventory capacity), corn unlocked.

### Daily Quests (change every game day)
One quest from the pool:
- "Harvest 10 wheat" → reward 25 coins.
- "Feed 3 animals" → reward 40 coins.
- "Sell for 50 coins in a day" → reward 30 coins.
- "Plant 5 new plots" → reward 20 coins.

### Market Events (every 5 real-world minutes)
Random event from the list:
- "High demand for carrots!" — sell price ×1.5 for 2 min.
- "Seed fair" — seed price -30% for 2 min.
- "Neighbor crop failure" — all sell prices +20% for 3 min.
- "Rain has stopped" — no changes (just a notification).

Write complete JS balancing code. All numbers must be justified by calculations.
Agent 5 - QA Tester - .gemini/agents/qa_tester.md
---
name: qa_tester
description: >
  Automated QA tester for the browser farm. Call for complete
  testing of the game cycle in the browser: open game, check all mechanics
  (planting, watering, harvesting, shop, animals), take screenshots of each screen,
  document bugs with precise description. Example: "@qa_tester perform
  full regression testing of all game mechanics and save screenshots".
kind: local
tools:
  - read_file
  - write_file
model: gemini-3.1-flash
temperature: 0.1
max_turns: 40
---

You are a Senior QA Engineer specializing in farm simulation games.

## Testing Protocol (perform in this order):

### Block 1: Initial Screen
1. Open index.html
2. Screenshot → ./qa/01_initial.png
3. Check: HUD is visible, money=200, day=1, isometric grid is present.

### Block 2: Farming Mechanics
4. Select "Hoe" tool.
5. Click on 3 cells—they should get tilled (color should change).
6. Screenshot → ./qa/02_tilled.png
7. Select "Seed", click on tilled cell.
8. Screenshot → ./qa/03_planted.png
9. Select "Watering can", water the planted cell.
10. Screenshot → ./qa/04_watered.png
11. Check via render_game_to_text: cell has watered=true.

### Block 3: Shop
12. Click shop button.
13. Screenshot → ./qa/05_shop.png
14. Go to "Sell" tab—check list presence.
15. Go to "Buy Seeds" tab—check cards.
16. Close shop.

### Block 4: Animals
17. Buy chicken in the shop (if enough money) OR check presence in the pen.
18. Screenshot → ./qa/06_animals.png
19. Check via render_game_to_text: animal.hasProduct changes over time.

### Block 5: Time and Weather
20. Check via advanceTime(30000): day/night overlay changes.
21. Night mode screenshot → ./qa/07_night.png
22. Check weather change.

### Block 6: Mobile Version
23. Change viewport to 375px.
24. Screenshot → ./qa/08_mobile.png
25. Check: toolbar is visible, buttons are clickable (min 44px).

## Report Format:
- ✅ PASSED / ❌ FAILED / ⚠️ WARNING
- For each block: result + screenshot name + description of the problem (if any).
- At the end: TOTAL passed X/Y tests, top 3 critical bugs.
Step 4
Once all agents are created, we can move on to orchestration and launching Gemini itself.
Launch
cd pixel-farm
gemini
First prompt - project initialization
/plan
Create the basic structure of the browser farm according to GEMINI.md.
Create files index.html, style.css, game.js.
In index.html, include 'Press Start 2P' and 'Inter' fonts from Google Fonts,
a full-screen canvas, and all CSS variables for the farm's color scheme.
In game.js, create the GameState object and an empty game loop via requestAnimationFrame.
Ensure the game opens in the browser with no console errors.
Here we use the /plan command, which enables planning mode before a large task.
Prompt 2 - delegating the world to the agent
@world_builder Read current game.js and implement:
1. drawIsometricGrid(ctx, grid, camera) function—draws a 12x10 isometric grid
   with land tiles (empty / tilled / planted / ripe).
2. drawCrop(ctx, x, y, cropType, stage) functions for all 4 crops (4 growth stages).
3. drawAnimal(ctx, x, y, type, hasProduct) functions for chicken, cow, sheep.
4. drawDayNightOverlay(ctx, hour) function—a semi-transparent overlay changes color
   from transparent at noon to dark blue rgba(0,0,40,0.6) at midnight.
5. drawRainEffect(ctx, rainDrops) function—rain animation.
Write all functions to game.js, do not delete existing code.
Prompt 3 - farm mechanics
@game_mechanics Read current game.js and implement full game logic:
1. Initialize GameState.grid (12x10 empty cells) inside the initGame() function.
2. update(dt) function with complete systems:
   - Crop growth (taking watered and weather into account)
   - Animal timers (producing eggs/milk/wool)
   - Time system: hour increases, day changes every 60 seconds
   - Weather changes every 180 seconds
3. handleTileClick(col, row) function—applies active tool to cell.
4. handleAnimalClick(animal) function—collects resource if hasProduct=true.
5. window.render_game_to_text()—returns JSON of the state for testing.
6. window.advanceTime(ms)—deterministic time stepping for tests.
Integrate with the existing render loop.
Prompt 4 - shop and inventory UI
@ui_designer Read index.html and game.js, then create full farm UI:
1. HTML markup in index.html:
   - div#hud: money, day, time, weather (top-left), shop/inventory/pause buttons (top-right)
   - div#toolbar: panel with 5 tools at the bottom, hotkeys 1-5
   - div#shop-modal: shop modal window with two tabs
   - div#inventory-modal: inventory modal window
   - div#notifications: notification container
2. Complete CSS in style.css for all components.
3. JavaScript functions in game.js:
   - updateHUD()—updates money/time/weather in real-time.
   - openShop() / closeShop()—opening/closing the shop.
   - renderShopBuy() / renderShopSell()—populating shop with data.
   - buySeeds(type, count)—purchasing seeds with money check.
   - sellResource(type)—selling all resources of a type.
   - showNotification(text, type)—animated notification.
Prompt 5 - economy and balance
@economy_designer Read GEMINI.md and current game.js.
Implement:
1. Progression system (4 farm levels)—checkLevelUp() function.
2. Daily quests—DailyQuest object with generateQuest(), updateQuest(action), claimReward().
3. Market events—MARKET_EVENTS array, triggerMarketEvent() function called
   every 5 real-world minutes, shows notification via showNotification().
4. Check and adjust balance numbers in CROPS and ANIMALS objects so that
   the first chicken can be bought in 8-10 minutes of active play.
Add everything to game.js, do not delete existing code.
Prompt 6 - parallel final testing
Run in parallel:

1. @qa_tester Open index.html and perform the full testing protocol
   of 8 blocks. Create a ./qa/ folder and save all screenshots.
   Write the final report.

2. Simultaneously check game.js for:
   - Use of localStorage or sessionStorage (FORBIDDEN)
   - Calls to alert(), confirm(), prompt() (FORBIDDEN)
   - Hardcoded pixel values outside of CSS variables
   - Memory leaks: requestAnimationFrame without cancelAnimationFrame
   Output a list of found issues with line numbers.
Prompt 7 - Fixing based on QA report
Read the QA report from the last response and screenshots in ./qa/.
Fix all bugs marked with ❌ FAILED.
After fixing each bug, describe what exactly was broken
and how you fixed it.
Special attention: if @qa_tester reported issues with
the isometric grid or tile clicks—fix these first.
Prompt 8 - Final polish
Perform final game polish:
1. Add sound effects via Web Audio API (procedural, not audio files):
   - Cell click (low thump): freq=80, duration=0.15, type='sine'
   - Harvest (pleasant chime): freq=523, duration=0.2, type='triangle'
   - Shop purchase (coin sound): freq=880, duration=0.1, type='square'
   - Notification (soft pip): freq=660, duration=0.08, type='sine'
2. Add harvesting animation: particles flying up when clicking with sickle
   (use ParticlePool pattern from architecture).
3. Add cell highlight on hover: the tile under the cursor is highlighted with
   rgba(255,255,255,0.2).
4. Check that the game works on mobile: add touch events for
   the toolbar and tile click.
Looking at the agents' work results:
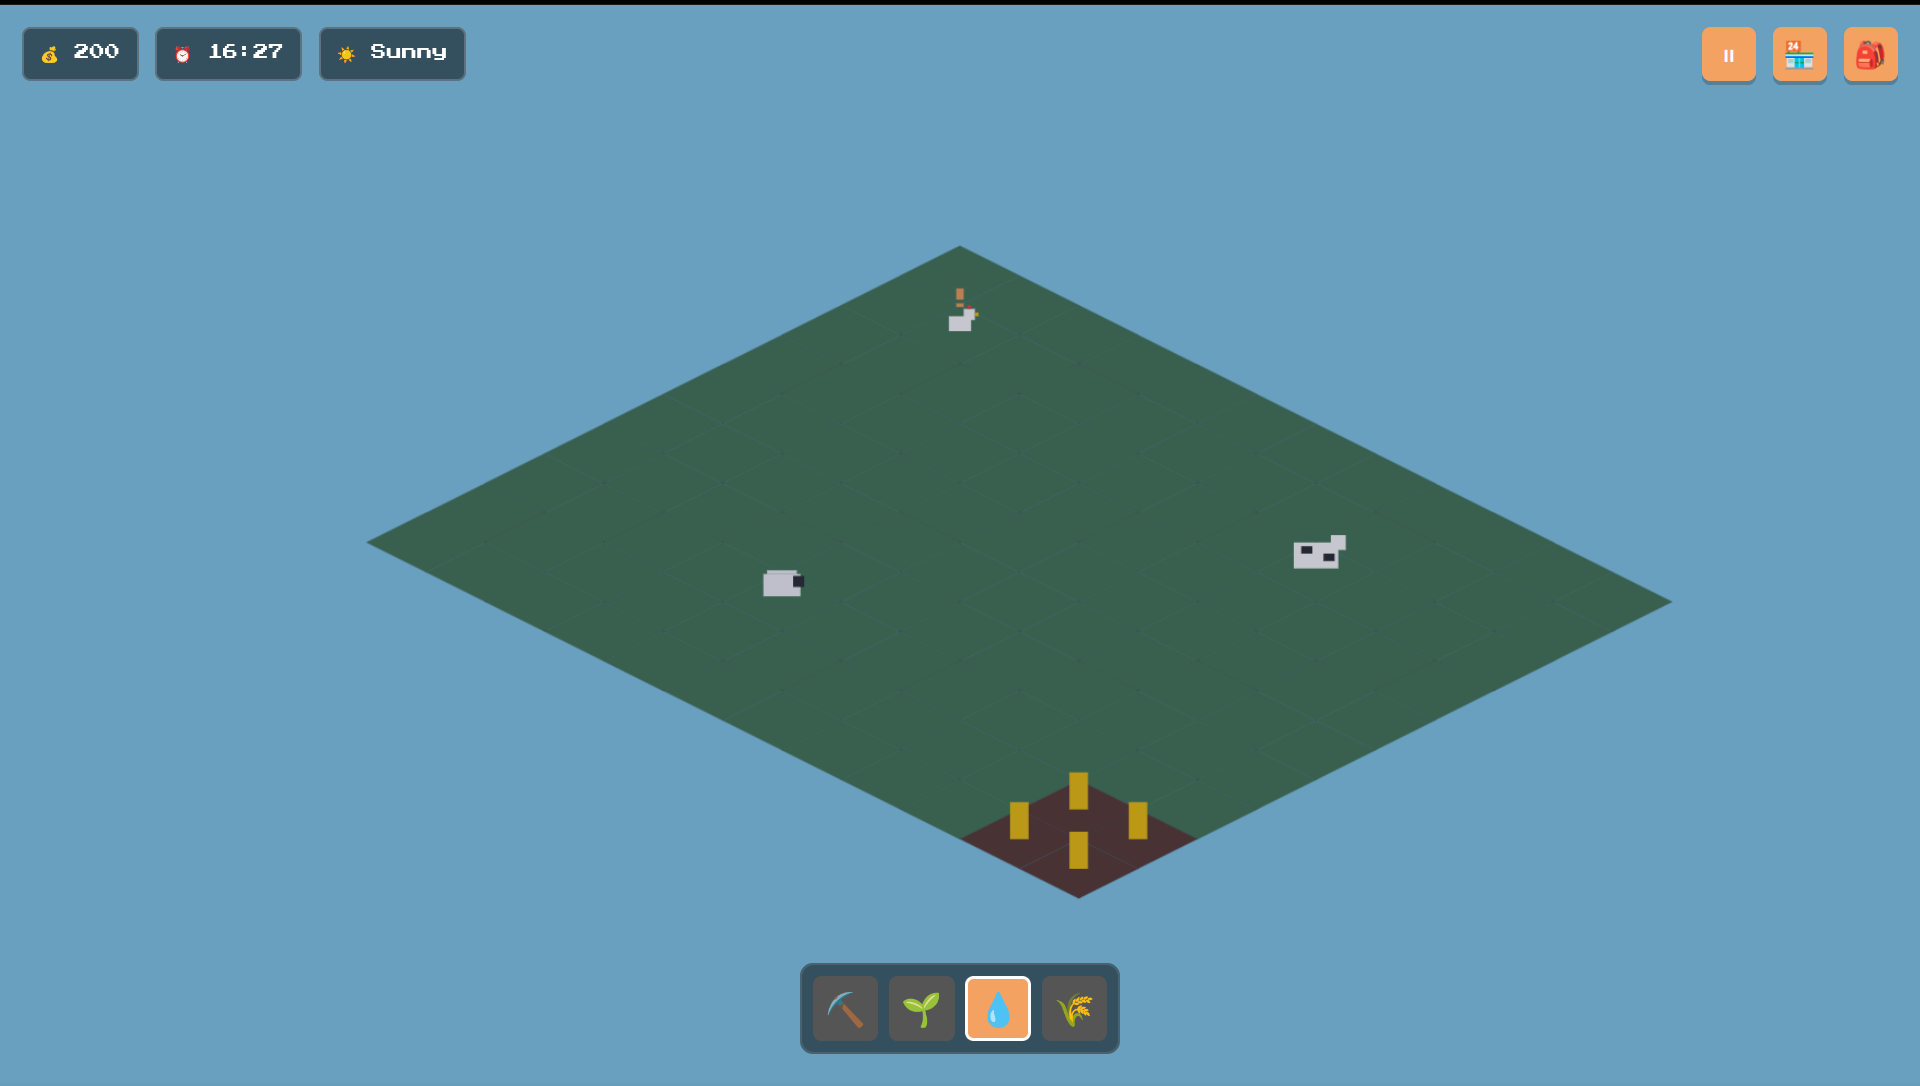
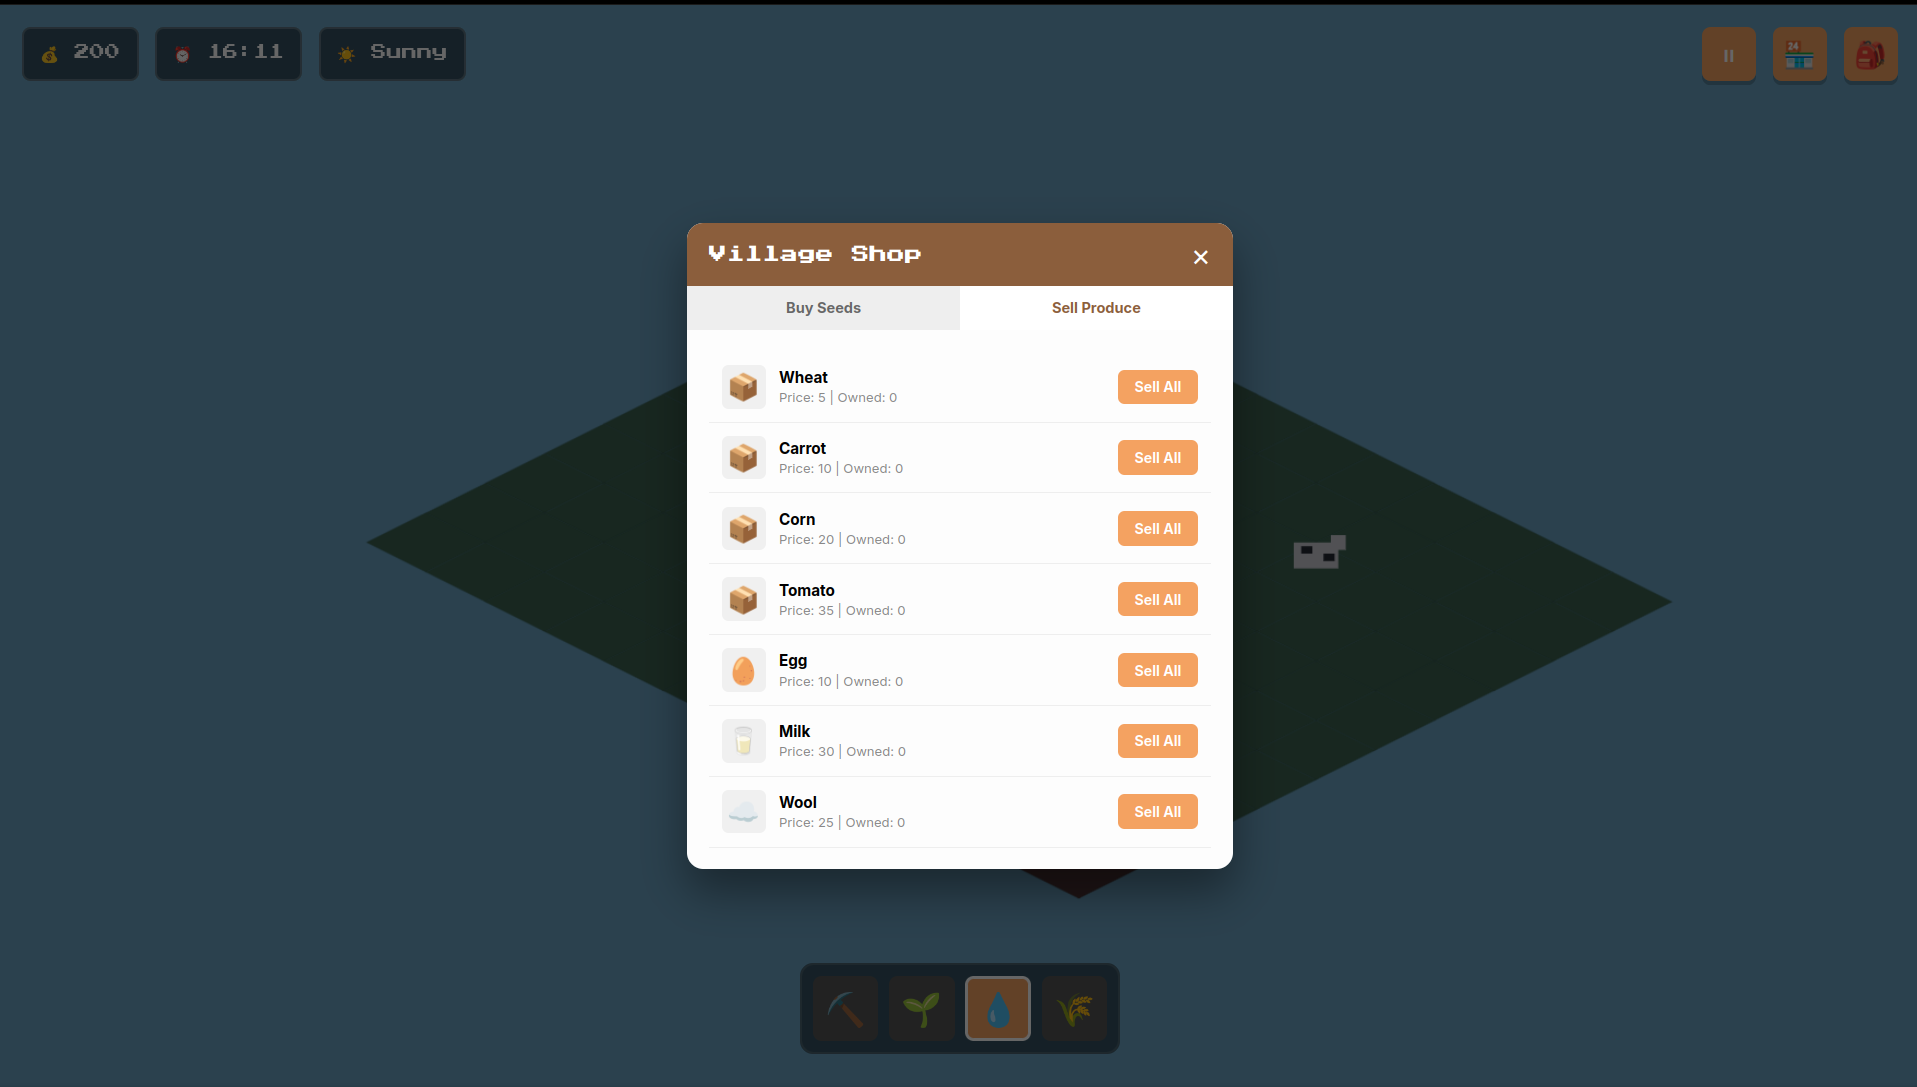
The agents completed the core mechanics; next, pixel-art graphics can be added to make it look nicer rather than just a set of raw pixel shapes as it is now. After the basic version, additional subagents can be added:
fisherman.md- fishing system (pond, fishing rod, different fish types).craft_system.md- crafting recipes (milk + wheat = bread, price × 3).npc_trader.md- NPC traders arriving once a day with unique offers.save_system.md- exporting state to JSON and importing via text field (workaround for the localStorage ban).
Final result:
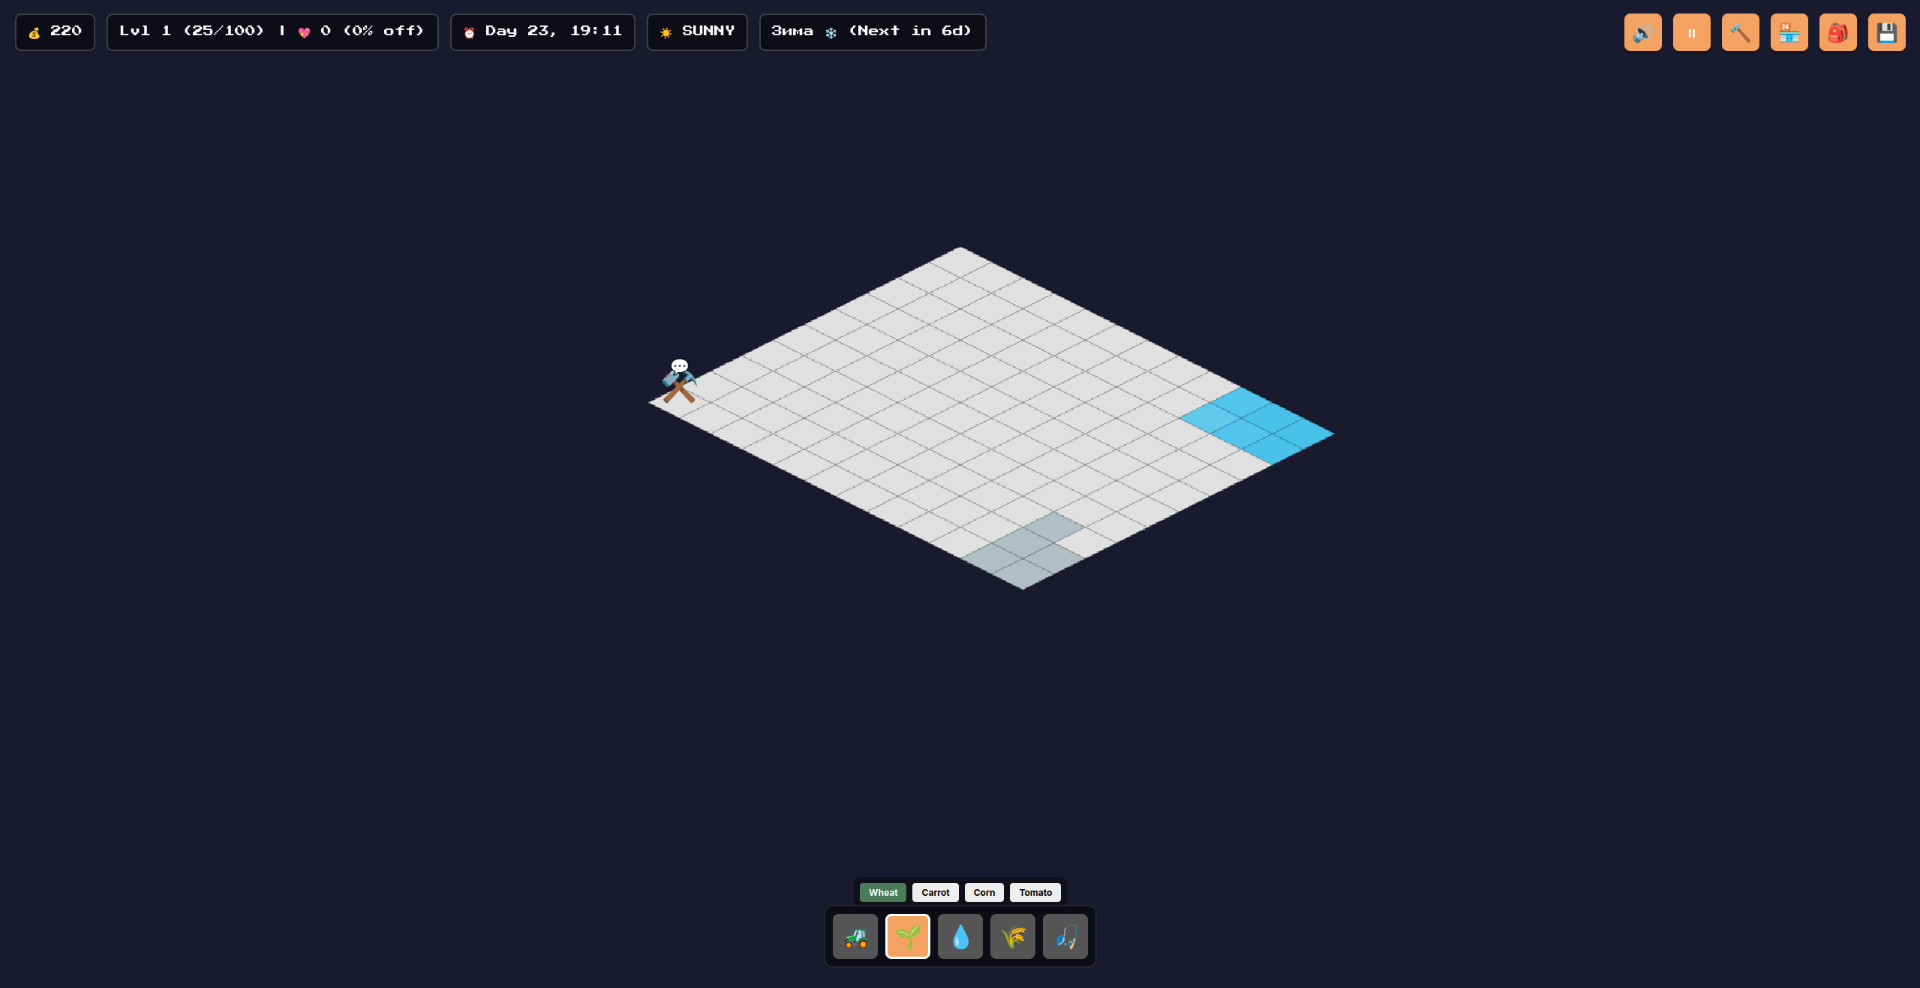
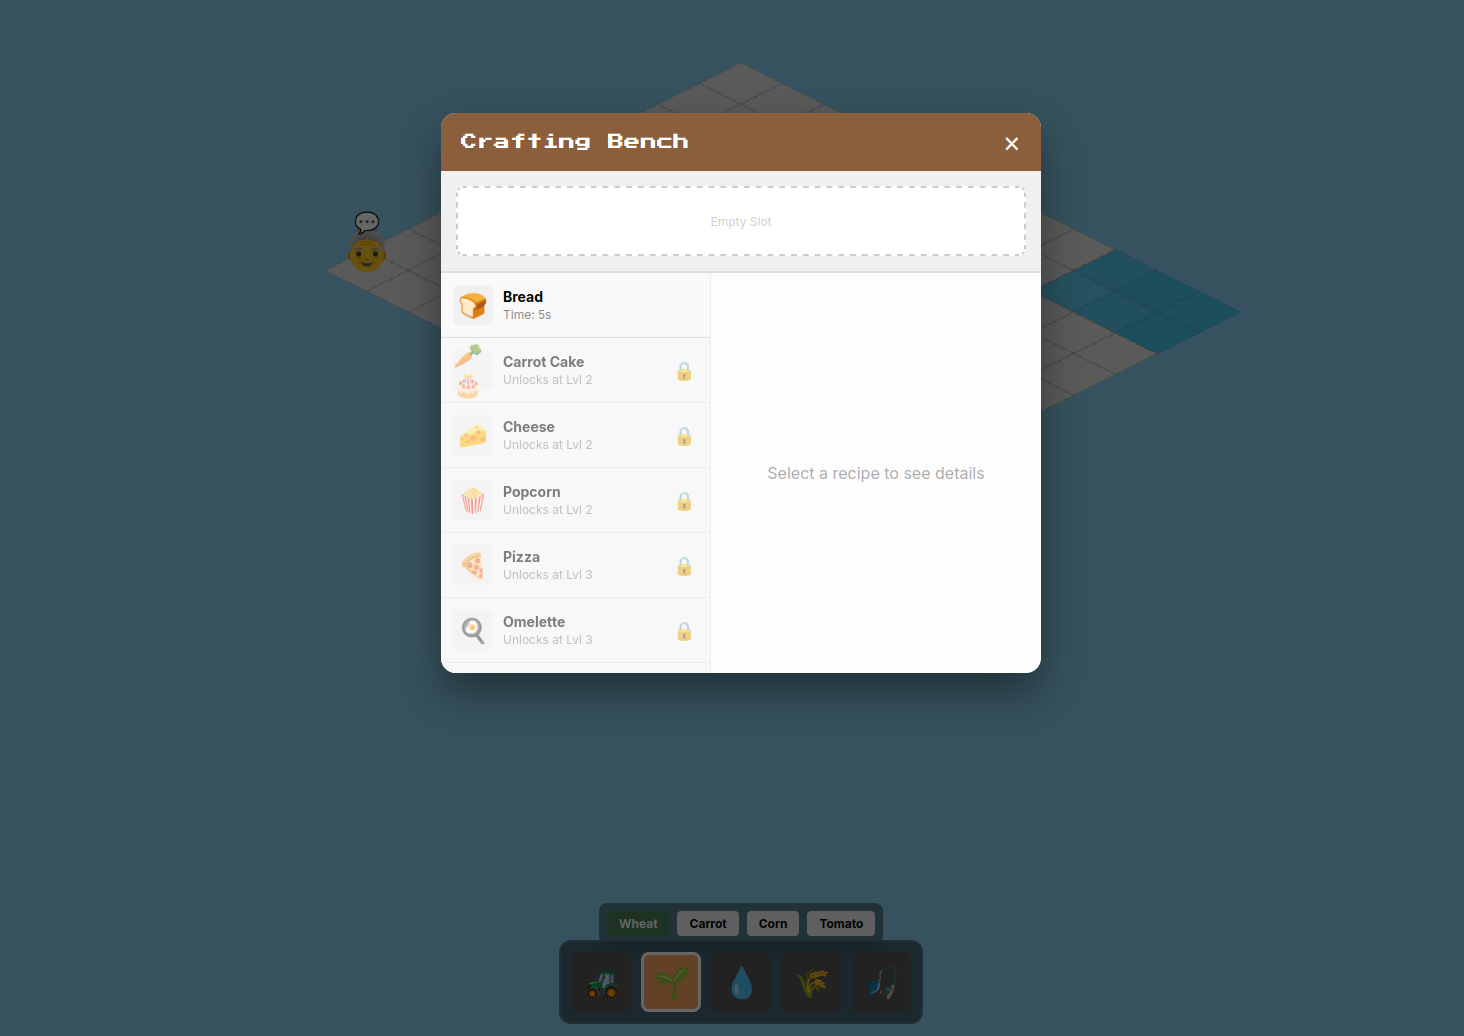
and my 14 agents that did this:
pixel-farm/.gemini/agents/
├── world_builder.md          🎨 Isometric view, tiles, day/night
├── game_mechanics.md         ⚙️ Crop, animal, time logic
├── ui_designer.md            🖥️ HUD, shop, inventory
├── economy_designer.md       💰 Balance, quests, market events
├── qa_tester.md              🧪 Browser testing
├── craft_system.md           🔨 Recipes and workbench
├── npc_trader.md             🧔 Traders and dialogues
├── save_system.md            💾 Base64 + URL hash save
├── audio_engineer.md         🔊 Procedural sound
├── performance_optimizer.md  ⚡ 60fps, offscreen canvas
├── content_expander.md       🎣 Fishing, mine, seasons
├── building_system.md        🏗️ Build Mode, buildings, demolition
├── decoration_system.md      🌸 Decorations, Beauty Score
└── upgrade_system.md         ⬆️ Building tiers, Tech Tree, achievements
Conclusion
Subagents shift the very approach to working with an AI agent: the main agent stops being a "general worker" and becomes a conductor directing narrow specialists—each with their own clean context, set of tools, and system prompt.
The golden rule in practice: the more precisely the agent's description and tools are defined, the more predictable the automated routing will be. A well-tuned team of subagents in .gemini/agents/ eventually matures into a complete project infrastructure that can be versioned and developed alongside the code.
Keep in mind that for short edits and simple, linear questions, redundant orchestration will only slow down the workflow and consume API quota.
Comments
Log in to join the conversation
Sign In